


Are you ready to create a fun and exciting playground for your dog right at home? Making your own dog agility equipment is easier than you think, and it’s a fantastic way to bond with your furry friend while keeping them active and healthy.
Imagine watching your dog dash through tunnels, leap over hurdles, and weave between poles—all built by your own hands. You’ll discover simple, step-by-step tips to craft safe and effective agility gear that suits your dog’s size and skill level. Keep reading to unlock the secrets to turning your backyard into a thrilling agility course your dog will love!
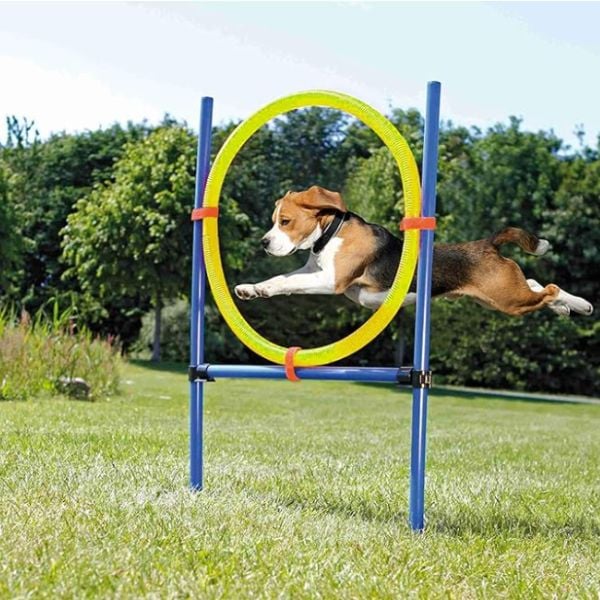
Credit: www.caninejournal.com
Choosing Materials
Building your own dog agility equipment can be a rewarding and fun project. But before you dive into construction, selecting the right materials is crucial for safety and durability. The materials you choose can greatly impact the longevity and effectiveness of your agility equipment, ensuring your canine friend stays safe while having fun.
Selecting Safe And Durable Materials
Your dog’s safety is paramount. Opt for materials that are sturdy and non-toxic. PVC pipeis a popular choice for jumps and weave poles because it’s lightweight, durable, and easy to work with. Woodcan be used for larger structures like A-frames and seesaws, but ensure it’s treated to resist weather damage. Avoid materials with sharp edges or splinters to prevent injuries.
Consider using rubber matsfor surfaces where your dog will land or run. These provide cushioning and grip, reducing the risk of slips and falls. Have you thought about how different materials can affect your dog’s agility training? Choosing the right ones will make a significant difference.
Tools Needed For Construction
Once you’ve selected your materials, gather the tools you’ll need. A power drillis essential for assembling PVC pipes and wood structures. Sawscan help you cut materials to the desired size. Do you have a measuring tape? Accurate measurements are key to constructing sturdy equipment.
Also, keep a screwdriverhandy for tightening screws and bolts. Consider using sandpaperto smooth any rough edges on wood or PVC pipes. Having the right tools can make the process smoother and ensure the equipment is safe for your dog.
Creating dog agility equipment is not just about construction; it’s about ensuring your pet’s safety and enhancing their training experience. Are you ready to start building? With the right materials and tools, your dog will soon be jumping and weaving through your homemade course like a pro!
Building A Dog Tunnel
Building a dog tunnel is a great way to add excitement and challenge to your dog’s agility course. A tunnel encourages your dog to develop confidence and speed while navigating through a fun obstacle. With some basic materials and clear instructions, you can create a durable and safe tunnel right in your backyard.
Materials Required
- Flexible tunnel fabric:Look for heavy-duty nylon or polyester, ideally waterproof and UV resistant.
- Wire hoops or rings:These keep the tunnel open and maintain its shape.
- Strong thread and needle or heavy-duty sewing machine:To stitch the fabric securely.
- Measuring tape:To get the right length and diameter of the tunnel.
- Scissors:For cutting fabric.
- Zip ties or clips:To attach hoops inside the tunnel.
- Optional:Ground stakes to anchor the tunnel and prevent it from moving during use.
Step-by-step Assembly
Start by measuring and cutting the tunnel fabric to your desired length. A common size is about 10 feet long and 24 inches in diameter, but adjust based on your dog’s size.
Next, sew the fabric into a long tube, making sure the seams are strong and even. Leave both ends open for easy access.
Insert the wire hoops evenly spaced inside the tube. Secure each hoop with zip ties or clips so they stay firmly in place.
Once all hoops are attached, check the tunnel’s flexibility and shape. It should be sturdy enough to hold its form but flexible enough to curve if you want to add turns.
Finally, anchor the tunnel to the ground with stakes if needed, especially if you have a larger or more energetic dog. This prevents the tunnel from sliding around during training.
Have you noticed how your dog reacts to new obstacles? Building this tunnel yourself lets you customize it to your dog’s needs and keeps training fun and safe.
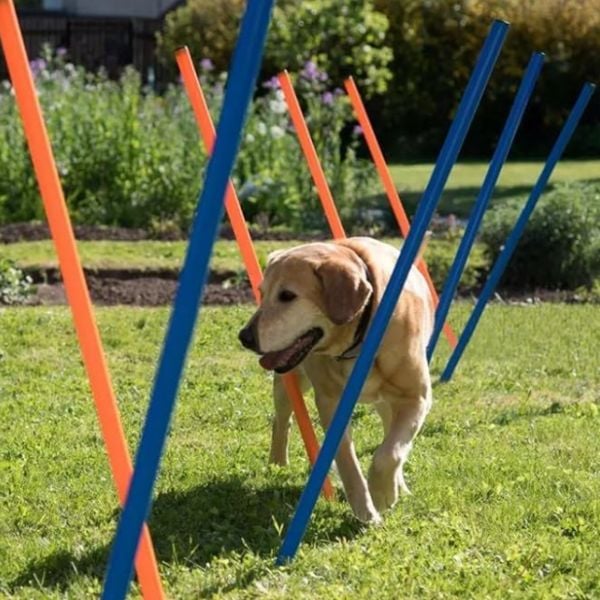
Creating Weave Poles
Creating weave poles is a key part of building your own dog agility course. These poles challenge your dog’s ability to navigate tight turns quickly and accurately. Setting them up correctly makes a big difference in how smoothly your dog moves through the course.
Pole Placement And Spacing
The standard setup calls for 6 to 12 poles spaced about 24 inches apart. This spacing is crucial because it mimics official agility competitions and helps your dog develop proper weaving technique.
Place each pole firmly in a straight line. Make sure the poles are vertical and evenly spaced—uneven gaps can confuse your dog and slow progress.
Think about the surface too. Soft ground may require deeper pole placement to keep them steady. Have you noticed how your dog reacts when poles are too close or too far apart? Adjust accordingly to suit your dog’s size and skill level.
Securing Poles For Stability
Stable poles keep your dog safe and confident. To secure poles, use sturdy PVC pipes or wooden dowels, pushing them deep into the ground or mounting them on a weighted base.
Weighted bases can be made by attaching a flat board with sandbags or concrete blocks underneath. This prevents poles from tipping over during fast weaving.
Check your poles regularly. Loose poles can become hazards, disrupting training and risking injury. Have you tried using different base materials to find what works best for your space?
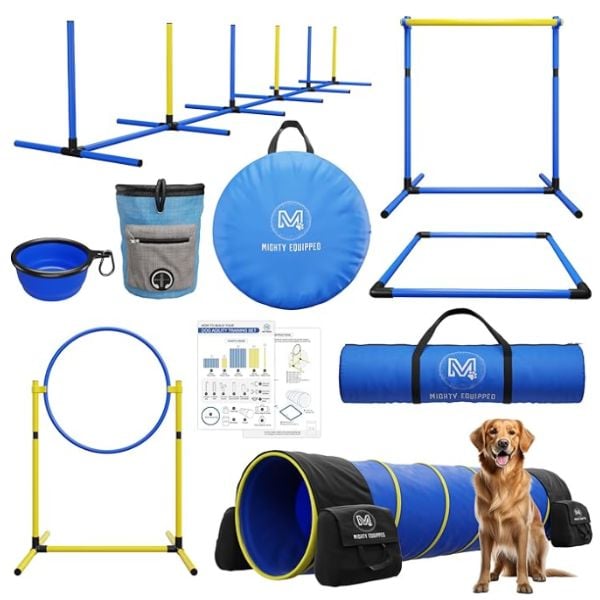
Credit: www.caninejournal.com
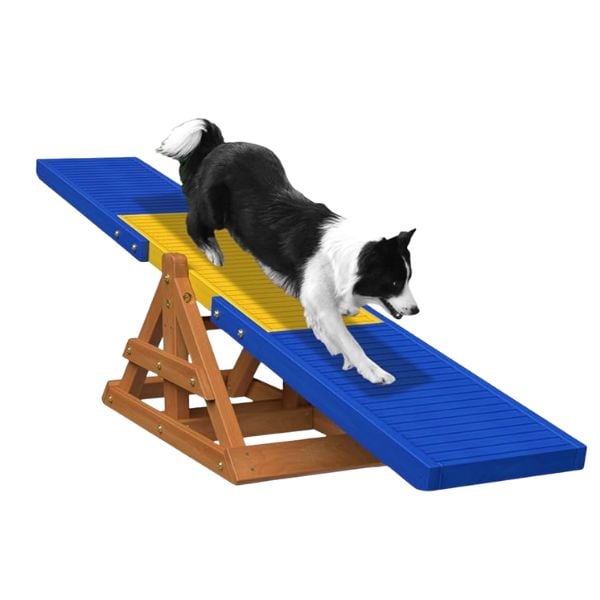
Constructing A Pause Table
Constructing a pause table is a key task in making dog agility equipment. This piece helps dogs learn control and timing. A well-built pause table must be sturdy and safe. It needs to hold the dog’s weight without wobbling. The surface should offer good grip to avoid slipping. Planning the size and design is important before building.
Design Dimensions
The standard pause table measures 36 inches by 36 inches. The height should be about 24 inches from the ground. Use strong wood like plywood or MDF for the top. The legs must be thick enough to support weight. Around 2×4 inch lumber works well for the frame and legs. Make sure the table is stable by adding cross braces. These braces prevent wobbling and increase safety.
Painting And Finishing Touches
Use outdoor paint to protect the table from weather damage. Choose bright colors for better visibility during training. Apply several coats of non-slip paint or add a rubber mat on top. This prevents dogs from slipping during their pause. Sand all edges smooth to avoid splinters. Let the paint dry completely before use. Adding rubber feet to the legs helps keep the table steady on hard floors.
Making A Jump Bar
Making a jump bar for your dog’s agility course is a rewarding project that lets you tailor the equipment to your dog’s size and skill level. It’s a straightforward build using common materials, but attention to detail can make a big difference in performance and safety. Let’s focus on creating a jump bar that’s adjustable and safe for your furry athlete.
Height Adjustments
Adjustability is key to accommodate dogs of different sizes and to increase difficulty as your dog improves. Use lightweight PVC pipes or wooden dowels for the bar because they are easy to handle and replace if damaged.
To make height adjustments simple, add several holes at different heights on the vertical supports. Use pegs or hooks to rest the bar on these holes so you can quickly change the height without tools.
- Mark holes every 3 to 6 inches for flexibility.
- Ensure the holes align perfectly on both sides to keep the bar level.
- Choose a bar length that’s proportional to your dog’s jump width—usually about 3 to 4 feet.
Think about how often you want to change the height. If you train multiple dogs, more height options will keep everyone challenged.
Safety Considerations
Safety should never be an afterthought. Use lightweight materials that won’t hurt your dog if they knock the bar down. PVC is an excellent choice because it breaks away easily, reducing injury risk.
Avoid sharp edges by sanding or covering corners with tape or foam padding. Stability is crucial—make sure the vertical posts have wide, sturdy bases to prevent tipping during jumps.
- Test the bar’s weight to ensure it falls off easily on impact.
- Place the jump on a soft surface like grass or rubber mats to protect your dog’s joints.
- Regularly inspect the equipment for cracks, splinters, or loose parts.
Have you noticed your dog hesitating at certain heights? It might be a sign to lower the bar or improve safety features to build confidence. Your dog’s comfort is the best guide for how to adjust your jump bar.
Credit: www.caninejournal.com
Setting Up The Course
Setting up a dog agility course is both an art and a science. It’s about creating a space that challenges your dog while keeping training fun and safe. How you arrange the equipment will shape your dog’s experience and progress.
Arranging Equipment For Practice
Start by spacing out the equipment so your dog has enough room to move comfortably. Avoid crowding obstacles together; give at least 6 to 10 feet between each piece to allow smooth transitions.
Think about the flow of the course. Arrange jumps, tunnels, and weave poles in a way that encourages natural movement patterns. Switch the order regularly to keep your dog sharp and adaptable.
Use markers or cones to help you visualize the path. This can help you test different layouts before settling on one. Don’t hesitate to remove or add obstacles based on your dog’s skill level.
Tips For Training Your Dog
Patience is key. Start slow, introducing one piece of equipment at a time. Let your dog get comfortable before combining obstacles.
Use positive reinforcement. Praise, treats, or favorite toys can motivate your dog to try new challenges. Remember, frustration will set back progress faster than a tough course.
Watch your dog’s body language closely. Signs of stress or confusion mean you should simplify or slow down the training. Could your dog be trying to tell you something through its behavior?
Consistency matters. Short, frequent sessions work better than long, exhausting ones. This keeps your dog eager and prevents burnout.
Frequently Asked Questions
What Materials Are Best For Homemade Dog Agility Equipment?
Use durable, lightweight materials like PVC pipes, wood, and sturdy fabric. These materials are safe, affordable, and easy to work with for building tunnels, jumps, and weave poles. Ensure all edges are smooth to avoid injuries during training.
How Do You Design Safe Dog Agility Obstacles?
Design obstacles with smooth surfaces and rounded edges. Keep heights and widths appropriate for your dog’s size and skill level. Use non-slip materials to prevent accidents. Test each piece before use to ensure stability and safety during training.
Can I Customize Agility Equipment For My Dog’s Size?
Yes, customize equipment dimensions based on your dog’s height and agility level. Adjust jump heights and tunnel diameters to suit your dog’s comfort and capability. Personalized equipment enhances training effectiveness and keeps your dog motivated and safe.
What Tools Are Needed To Build Dog Agility Equipment?
Basic tools include a saw, drill, measuring tape, and sandpaper. These help cut, assemble, and smooth materials for jumps, tunnels, and weave poles. Having the right tools ensures precise construction and durability of your homemade agility course.
Conclusion
Creating dog agility equipment can be a fun and rewarding task. Start with simple materials and clear designs. Focus on safety and comfort for your dog. Test each piece carefully before use. Practice regularly to help your dog learn. This activity builds trust and keeps your dog active.
Enjoy the process and watch your dog improve. Building your own equipment saves money and allows customization. Keep your dog’s size and skill level in mind. Small steps lead to big progress in agility training.