


Are you ready to take your dog’s training to the next level? Building your own dog agility equipment is easier than you think, and it can make a huge difference in your dog’s fitness and happiness.
Imagine watching your dog jump, weave, and run through obstacles you created yourself. Not only will you save money, but you’ll also enjoy quality time with your furry friend. In this guide, you’ll discover simple steps and smart tips to build safe and fun agility gear right at home.
Keep reading, and get ready to turn your backyard into an exciting playground for your dog!

Credit: www.theagilitychronicles.com
Choosing The Right Materials
Building your own dog agility equipment is an exciting project that allows you to tailor obstacles to your dog’s needs while also saving money. However, choosing the right materials is crucial to ensure safety and durability. The right supplies can make or break the longevity and functionality of your homemade equipment. Let’s dive into how you can select materials that will stand the test of time and provide a safe environment for your furry friend.
Selecting Safe And Durable Supplies
Safety should always be your top priority. Consider materials that are non-toxic and sturdy enough to withstand your dog’s weight and activity level. PVC pipes are a popular choice for many dog agility enthusiasts due to their affordability and durability. They are lightweight, easy to cut, and can handle outdoor conditions.
Wood is another great option, especially for building ramps and bases. Ensure the wood is treated to prevent splinters, which could harm your dog. You might also want to look into rubber mats for areas where traction is important, like on balance beams or see-saws.
Have you considered repurposing materials? Old tires can serve as perfect tunnels or obstacles. Think creatively about what you already have that could be transformed into agility equipment. This not only saves money but also contributes to sustainability.
Tools You’ll Need
To construct your agility equipment, you’ll need a few essential tools. A saw, either hand or electric, will be necessary for cutting PVC pipes and wood. A drill will come in handy for assembling pieces securely.
Measuring tape is indispensable for ensuring that each obstacle is built to the right dimensions. Additionally, a level can help you ensure everything is stable and even. For PVC constructions, PVC cutters are a great investment as they make the job easier and safer.
Safety gear shouldn’t be overlooked. Gloves and goggles can protect you from splinters or debris. Are you ready to start building your own agility course? Gathering the right tools is the first step in making your vision come to life.
Building A Dog Tunnel
Building a dog tunnel is a fun project that improves your dog’s agility skills. This equipment helps your dog learn to run through enclosed spaces quickly and confidently. Creating a tunnel at home saves money and allows customization to fit your dog’s size and needs.
Materials For The Tunnel Frame
- Flexible corrugated plastic tubing (about 10-15 feet long)
- Strong wire or PVC pipes for support
- Zip ties or heavy-duty tape
- Non-slip mat or tarp for the base
- Scissors or utility knife
- Measuring tape
Assembling The Tunnel
Start by shaping the flexible tubing into a smooth curve or a straight line. Use wire or PVC pipes to hold the shape by inserting them inside or outside the tubing. Secure the ends and joints with zip ties or tape to keep the frame steady. Make sure the tunnel is wide enough for your dog to pass comfortably.
Adding Stability And Safety Features
Place a non-slip mat or tarp under the tunnel to prevent slipping. Check all connections for sharp edges or loose parts. Add extra zip ties if needed for strength. Make sure the tunnel stays in place during use by anchoring it with stakes or weights. Keep the tunnel clean and dry to avoid accidents.
Creating Weave Poles
Creating weave poles is a vital part of building your own dog agility course. These poles train your dog to weave quickly and accurately, boosting their agility and focus. Setting them up correctly ensures safety and effectiveness, making practice sessions both fun and productive.
Choosing Pole Materials
Pick materials that are durable but lightweight. PVC pipes work great because they are sturdy, weather-resistant, and easy to clean. Wooden dowels are another option, but make sure they are smooth and free of splinters to protect your dog’s paws.
Consider the pole diameter too. Around ¾ to 1 inch thick is usually comfortable for dogs to weave through without discomfort. Avoid metal poles as they can be too slippery and cold, which might discourage your dog from weaving confidently.
Spacing And Installation Tips
Proper spacing between poles is crucial for your dog’s learning and safety. The standard distance is about 18 inches apart, but smaller dogs may need poles closer together. Mark your spacing on the ground before installing to ensure consistency.
Secure the poles firmly so they won’t tip over during practice. You can use a wooden base with holes drilled for the poles or drive them into the ground if you’re setting up outside. Stability helps your dog stay focused and prevents injury.
Credit: www.amazon.com
Constructing A Jump Bar
Constructing a jump bar is a key part of building your own dog agility equipment. It helps train your dog to jump safely and confidently. A well-made jump bar is sturdy and adjustable. It can fit dogs of different sizes and skill levels.
Design Options For Adjustable Heights
Choose materials like PVC pipes or lightweight wood for the jump bar. Use brackets or clips to hold the bar. These allow quick height changes.
- Use a simple frame with vertical posts and horizontal bars.
- Drill holes at different heights on the posts.
- Insert the jump bar into the holes for various jump levels.
- Use adjustable clamps or hooks for easy height changes.
This flexibility helps dogs grow and improve their jumping skills safely.
Securing The Jump Bar
Secure the jump bar to avoid accidents during training. Ensure the bar falls away easily if the dog hits it.
- Use lightweight materials to reduce injury risk.
- Attach the bar with clips or hooks that release on impact.
- Test the bar stability before training sessions.
- Place the jump on a flat, non-slip surface.
Safety is key. A secure but flexible jump bar protects your dog and builds confidence.
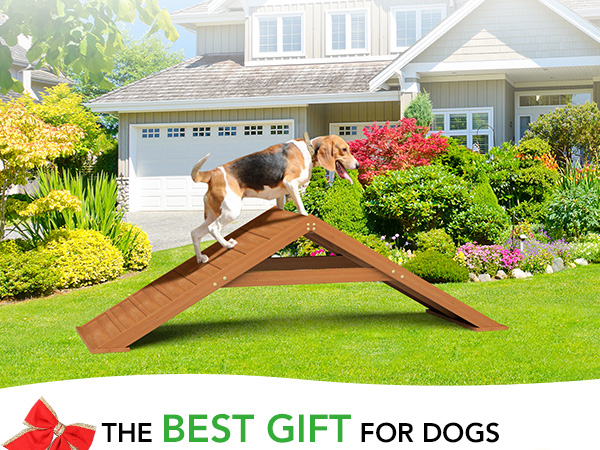
Making A Contact A-frame
Making a contact A-frame for your dog’s agility training is a rewarding project. It not only saves money but lets you customize the size and materials to fit your space and your dog’s needs. This piece of equipment is vital for building confidence and improving your dog’s coordination.
Building The Frame Structure
Start by selecting sturdy wood, like plywood or treated lumber, for durability. Cut two large triangular sides that will form the A-frame’s shape. The standard height ranges from 5 to 6 feet, but adjust based on your dog’s size and skill level.
Connect the sides with horizontal support beams spaced evenly to keep the frame stable. Use strong screws and brackets to secure the joints tightly. Remember, a solid frame means your dog can climb and descend safely without any wobble.
Consider adding hinges at the top so the frame can fold for easy storage or transport. How much space do you have available for training? Planning this early will help you decide the frame’s final dimensions.
Adding Traction And Safety Surfaces
Cover the climbing surfaces with non-slip materials like outdoor carpet or rubber mats. This prevents your dog from slipping and getting hurt. Use weather-resistant glue or staples to keep these materials firmly attached.
Paint the contact zones in bright colors to help your dog identify where to place their paws. Most trainers recommend marking the bottom 3 feet of each side as the contact area. This visual cue supports safer and more accurate training.
Test the surface yourself before letting your dog try it. Is it grippy enough? Could it cause splinters or sharp edges? Fix any rough spots with sandpaper or replace materials if needed to ensure your dog’s comfort and safety.
Setting Up A Pause Table
Setting up a pause table is an important part of building your own dog agility equipment. This table helps dogs learn to stop and stay during an agility run. It also improves their focus and control. Making a pause table is simple and does not require many materials. You can customize it to fit your dog’s size and skill level.
Dimensions And Design Ideas
A typical pause table is square, about 36 inches by 36 inches. The height should be 24 inches to 30 inches, matching your dog’s shoulder height. Use smooth wood or plywood for the surface. Paint it with non-slip paint or add textured tape. This prevents your dog from slipping off during a pause.
Keep edges rounded for safety. You can also decorate the table with bright colors or patterns. This makes it easy for your dog to see the table during training. Some builders add foldable legs to save space. Others create a fixed table for more stability.
Ensuring Stability
Stability is key for a safe pause table. Use strong wood like pine or plywood that can hold your dog’s weight. Attach wide legs or a solid base for balance. Avoid thin or wobbly legs that may tip over.
Check all screws and bolts regularly. Tighten any loose parts before each training session. Adding rubber feet or non-slip pads under the legs helps keep the table in place. You want your dog to feel secure standing or sitting on the table.
Testing And Adjusting Your Equipment
Testing and adjusting your dog agility equipment is key to safe and fun training sessions. Proper checks help spot issues early. Adjustments improve the fit and comfort for your dog. This phase ensures the equipment works well before serious use. Take time to observe how your dog interacts with each piece. Make small changes based on those observations. This process boosts confidence and performance.
Safety Checks
Inspect every piece of equipment closely. Look for sharp edges or splinters. Check for loose screws or nails. Make sure all parts are stable and secure. Test the weight limit of jumps and tunnels. Confirm the surface is non-slip and clean. Replace worn or damaged parts immediately. Keep the setup safe for all weather conditions.
Training Tips For Your Dog
Introduce one piece of equipment at a time. Use treats and praise to encourage your dog. Start with simple commands and short sessions. Let your dog explore the equipment freely at first. Gradually increase difficulty and speed. Watch your dog’s body language for signs of stress. Always end sessions on a positive note to build trust.

Credit: proplaygrounds.com
Maintaining Your Agility Equipment
Maintaining your dog agility equipment is essential to keep your furry friend safe and to ensure the equipment lasts through many training sessions. Neglecting regular care can lead to unexpected breaks or accidents, which nobody wants during a fun agility run. Let’s look at some practical ways to keep your equipment in top shape.
Regular Inspection Routines
Set aside time each week to check every piece of your agility equipment. Look closely for cracks, loose screws, or any signs of wear that could cause failure during use.
Don’t just glance—run your hands along surfaces to feel for splinters or rough edges. Even small imperfections can hurt your dog or affect their performance.
Ask yourself: Have I checked the stability of each obstacle? Wobbly poles or unsteady jumps can be dangerous and reduce your dog’s confidence.
Repair And Storage Tips
Fix problems as soon as you spot them. Tighten screws, sand down rough spots, and replace any broken parts without delay.
Keep a small repair kit handy with essential tools like a screwdriver, sandpaper, and extra bolts. This way, you can act fast and avoid prolonged downtime.
Store your equipment in a dry, sheltered place to protect it from weather damage. Avoid leaving items outside where rain or sun can weaken materials.
Remember, how you store your agility gear affects its lifespan just as much as how you use it. Have you thought about creating a dedicated storage area that keeps everything organized and safe?
Frequently Asked Questions
What Materials Are Best For Diy Dog Agility Equipment?
Use lightweight, durable materials like PVC pipes, wood, and non-slip mats. These ensure safety and easy handling for your dog during training.
How Much Space Is Needed To Build Agility Equipment?
A minimum of 100 square feet is ideal. Ensure enough room for jumps, tunnels, and weave poles with safe clearance.
Can I Customize Agility Equipment For My Dog’s Size?
Yes, adjust height and width according to your dog’s breed and skill level. Customizing improves comfort and performance during training.
How Do I Ensure Safety When Building Equipment?
Use smooth edges, secure joints, and non-toxic paint. Regularly inspect for wear and stability to prevent injuries during use.
Conclusion
Building your own dog agility equipment can be fun and rewarding. It saves money and allows customization for your dog’s needs. Start with simple tools and materials you have at home. Safety is key—always check stability before use. Practice regularly to help your dog learn and enjoy.
Watching your dog improve feels great. Try different obstacles to keep things interesting. Your dog will thank you with happy, active play. Keep learning and improving your setup over time. Enjoy the process and bond with your dog.